The Wet N' Wild Spring 2014 Street Art Limited Edition collection contains two JELLY polishes, and I when I read about it from
Nouveau Cheap, I absolutely had to scoop them up at my local Walgreens. Luckily for me, not only did I find the entire collection untouched in its display, but they were on sale at 69 cents (even though its regular retail price at 99 cents isn't bad either).
Wet N' Wild "Deception" and "Cursed"
Jelly polishes have a liquid-like finish that seems see-through but shiny on your nail. They're one of my favorite polish types because you can use them in "jelly sandwich" nails, which is painting glitter polish in between layers of jelly polish, hence the sandwich name. The final look makes the glitter seem like it's suspended on your nail!
I haven't bought polishes from the Wild Shine in a while, but I do like their polishes in general. I don't open beauty products in store, and unfortunately, the brush in my "Deception" bottle was frayed and funky. I dipped it in the polish a few times to try and it eventually smoothed out, but after a while, the bristles would stick out again. This doesn't bother me since it's a drugstore polish, but I know a few lacqueristas who wouldn't find it acceptable.
Wet N' Wild "Deception"
To create a jelly sandwich, I painted two coats of my jelly polish on my nails. Since you'll be using several layers of polish, be sure to let each coat dry enough before adding another.
One and two coats of Wet N' Wild "Deception"
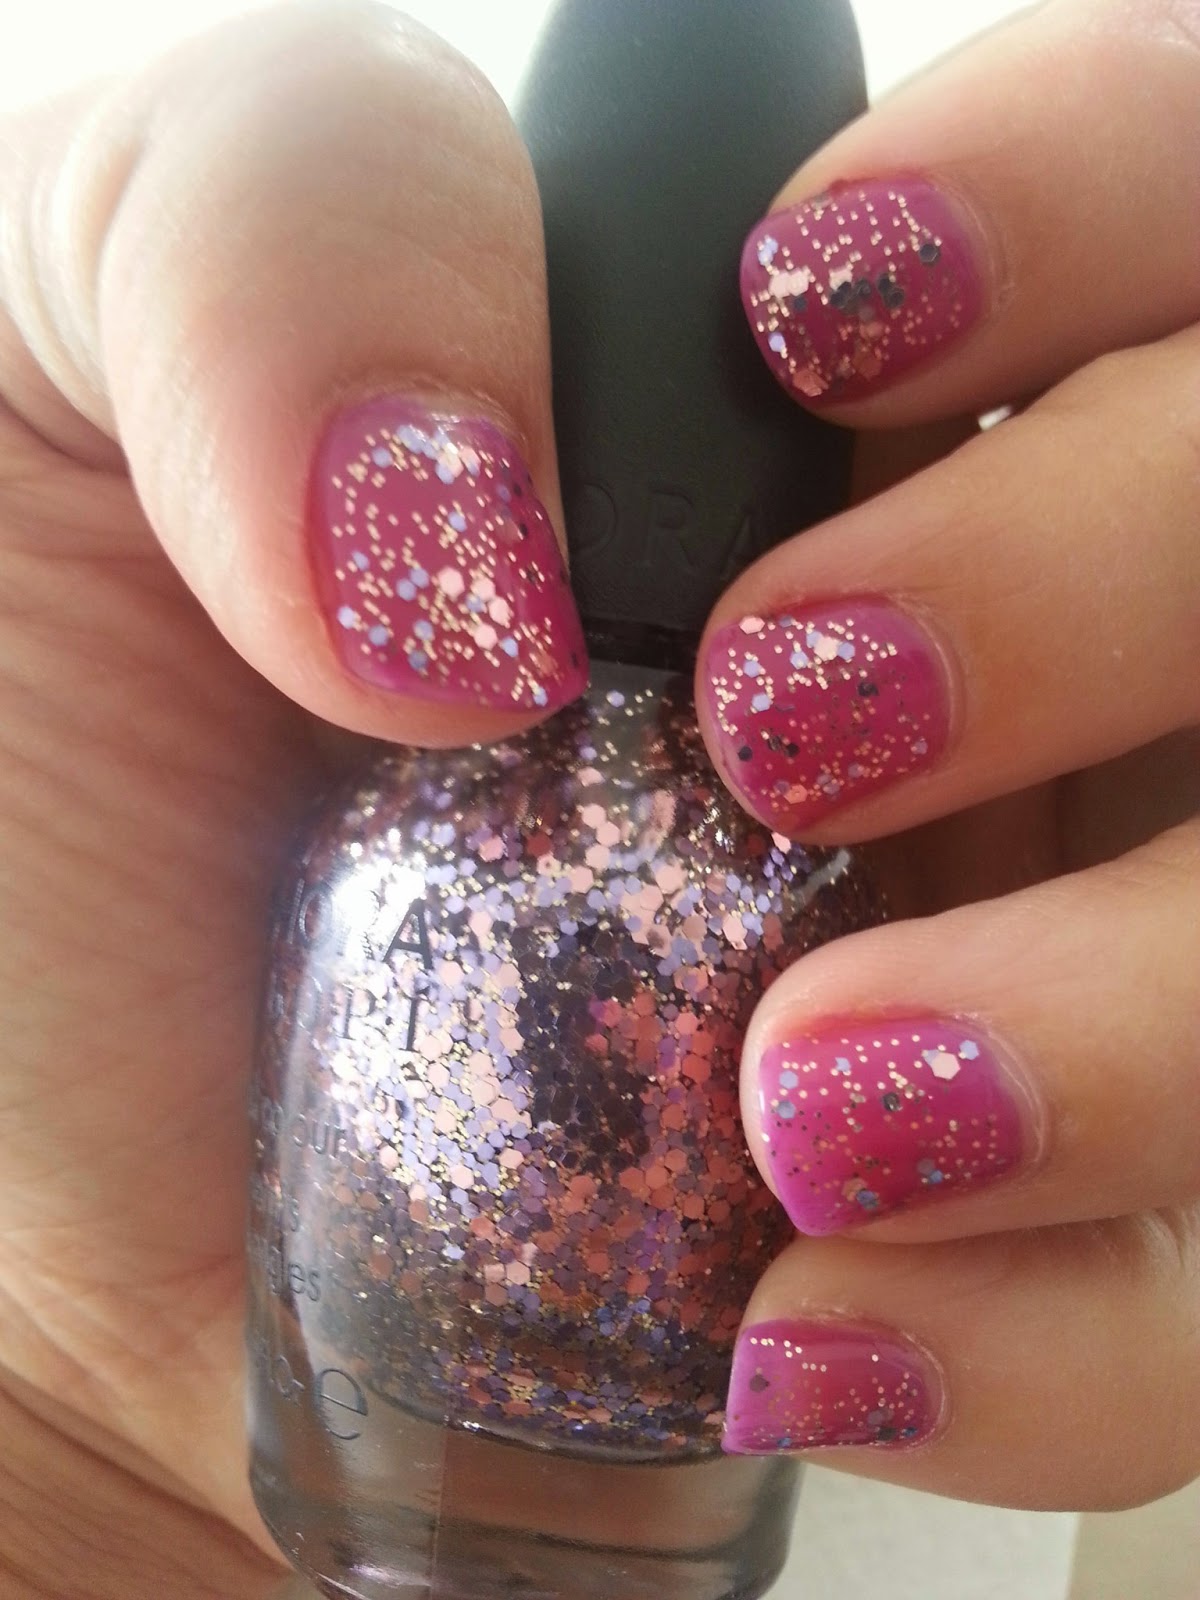
Next, I added a layer of glitter polish. I chose Sephora OPI "Mauve-ie Star in the Making". It is a nice, mixed glitter topper with mauve and lilac purple hexagonal chunky glitter mixed with microglitter. One layer was enough since it is a generously dense topper.
Sephora OPI "Mauve-ie Star in the Making" over Wet N' Wild "Deception"
I sandwiched the glitters in one last coat of "Deception"! Depending on how opaque the jelly polish is, you might want to add more, but only one coat was enough for that juicy goodness!
Finished "jelly sandwich" manicure with Wet N' Wild "Deception"
I am such a huge fan of jelly sandwich manicures! Both colors "Deception" and "Cursed" are bright and festive for summer. And at a drugstore price, these polishes are a definite hit for me. I'm glad I could tear my eyes away from my nails long enough to write this tutorial.